Customizing inventory fields in HQ Warehouse: A step-by-step guide for streamlined management
Learn how to configure and customize item fields to meet your specific needs when managing inventory for commercial customers. This customization allows you to track vital information related to your items better and ensures consistency in data entry. Follow these 9 steps to set up the integration:
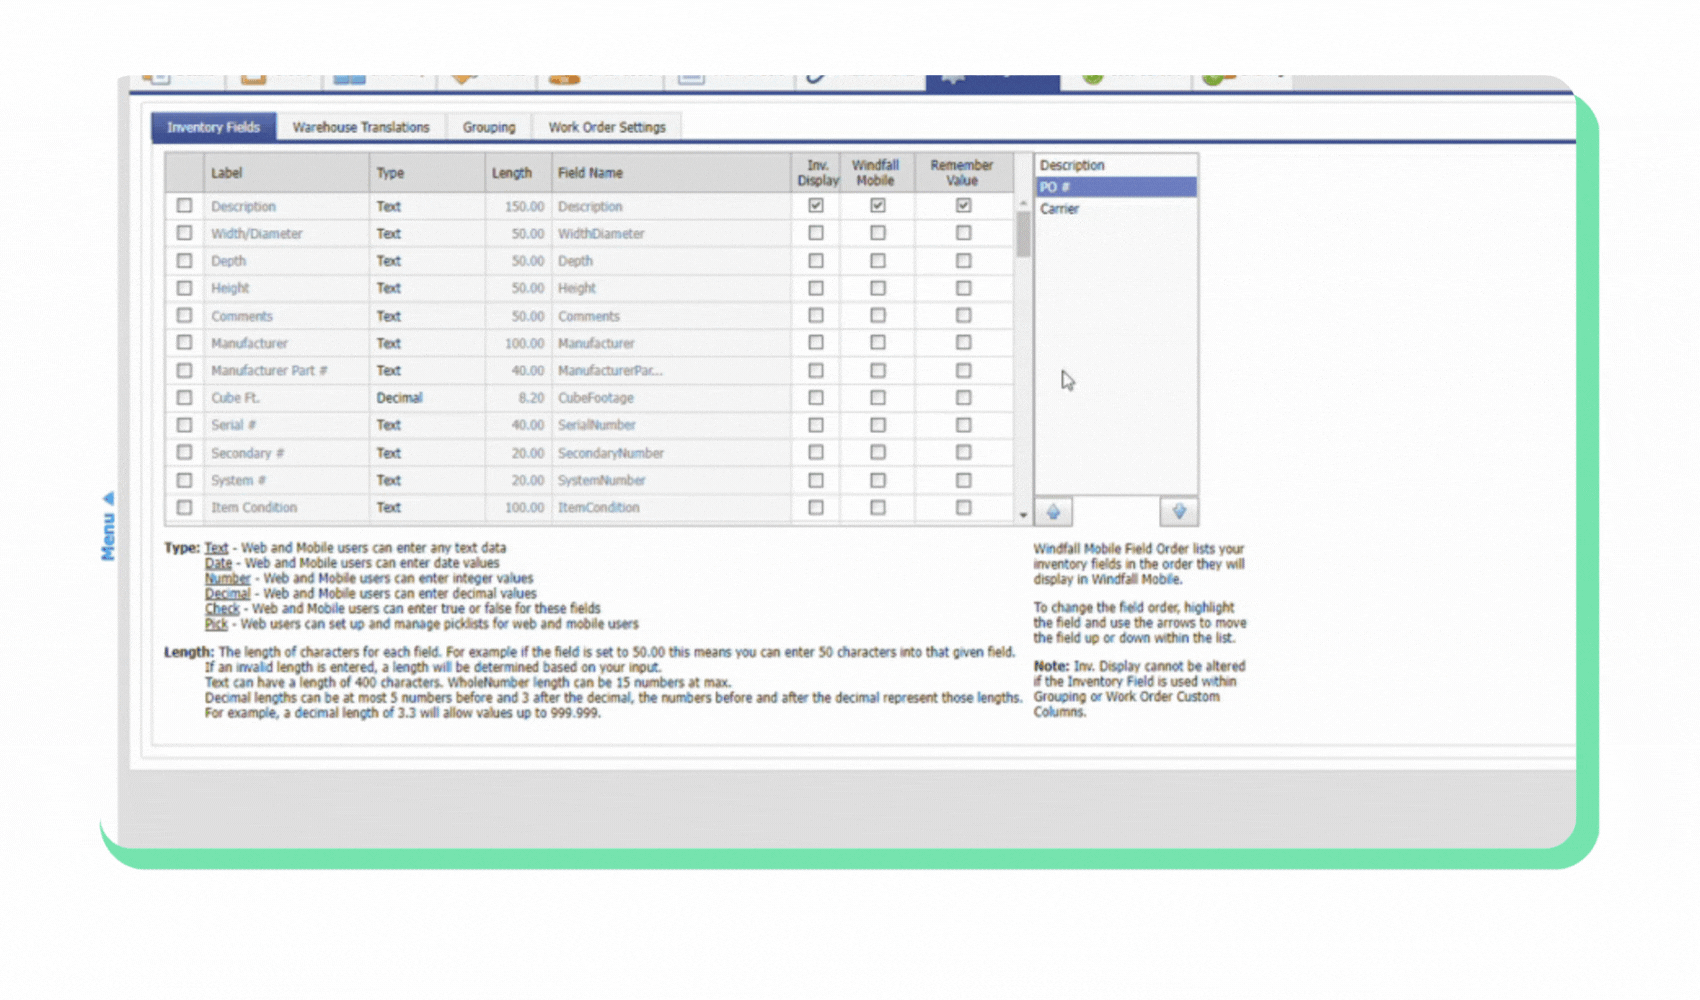
Setting up custom fields
Navigate to the Configuration tab within the customer profile.
Browse pre-built fields or choose from custom text, date, number, and decimal fields.
Rename and customize the behavior of selected fields.


Custom check and pick list fields
Set up custom check fields for yes/no options.
Create custom pick lists with pre-defined values for consistent data entry.
Saving and organizing field configuration
Save changes after setting up all custom fields.
View the configured fields in the inventory and on mobile devices.
Adjust the order of fields for easier data entry.
Modify field configurations at any time according to your preferences.